


Who has time to fill out specific payment information on financial agreements, track every single signature obtained on documents by your clients, and then also remember to send the payment request? Maybe some, but if we're being honest...who really wants to? :)
We understand that your time is valuable, and that's why we offer seamless integrations with Dropbox Sign and DocuSign. With these integrations, you can effortlessly bundle payment requests with documents that require signatures.
And the absolute best part about this all-in-one workflow?
Your clients will not be able to make a payment on the request until all signers have signed the document -- giving you the peace of mind that your operations are compliant every step of the way.
Whether you're brand new to collecting eSignatures in AdvicePay or you're a seasoned user, I'd love to share my top 5 tips and tricks for maximizing our eSignature features!
1. The most helpful resource for all eSignature requests sent: your Documents page!
Need to know who has signed the document and whether anyone still needs to complete their portion? How about verifying the signing order created when the document was sent out (if a signing order was enabled)? Or what if you want to send a manual reminder to the signers who still need to complete the document?
Whether you're using Dropbox Sign or DocuSign, the Documents page is by far the best page we have to see all of these details and complete actions on documents that have been sent.
To access the details of any documents out for signature, navigate to the Document Vault > Documents page in the left main menu of your AdvicePay account. Next, click the drop-down menu next to your client's document.
Below are some of our favorite quick actions in your Documents page!
Viewing Signing Status and Signing Order (if assigned)
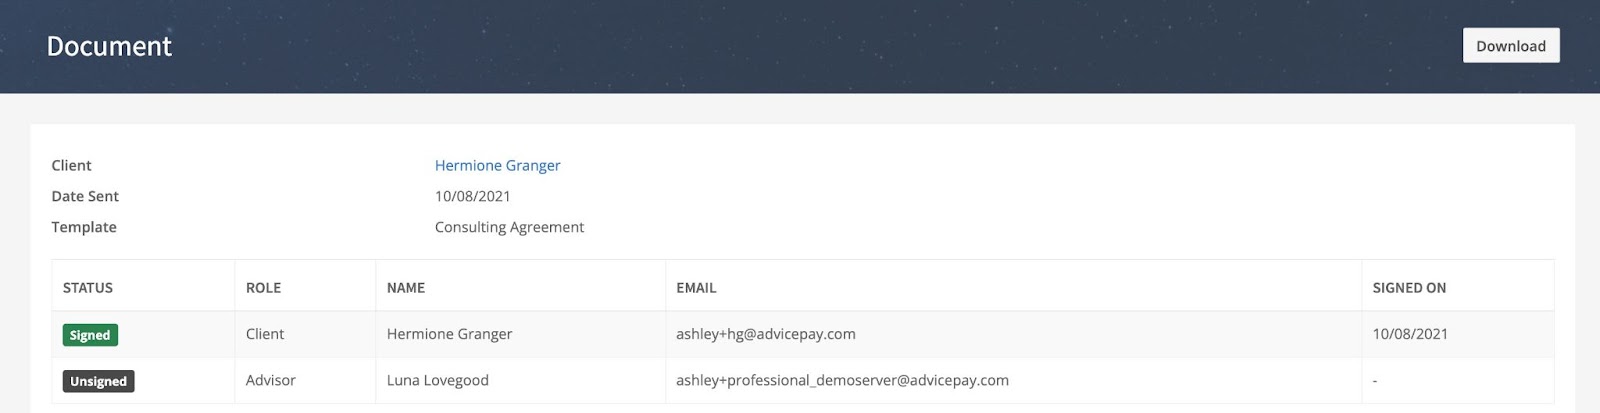
To review the extra information about the document sent, choose View Details from a document's drop-down menu.
On this page, you will be able to see the client and template name, date that the document was sent, each signer in order (if signing order for the template was enabled), and each signer's status on the document (e.g. Opened, Signed, & Unsigned).
The best part of this page is when a signer has completed their portion, their status changes to Signed and the date they signed appears in the Signed On column.
Sending Reminders:
Once you click the drop-down next to your client's document, you will have the opportunity to immediately send a reminder to all signers who have not yet signed the document by choosing Send Reminder.
Document Report:
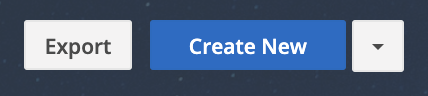
For your operation's needs, you can also export an Excel file with details for all the documents listed on the Document's page by visiting Document Vault > Documents and clicking the Export button in the top right-hand corner:
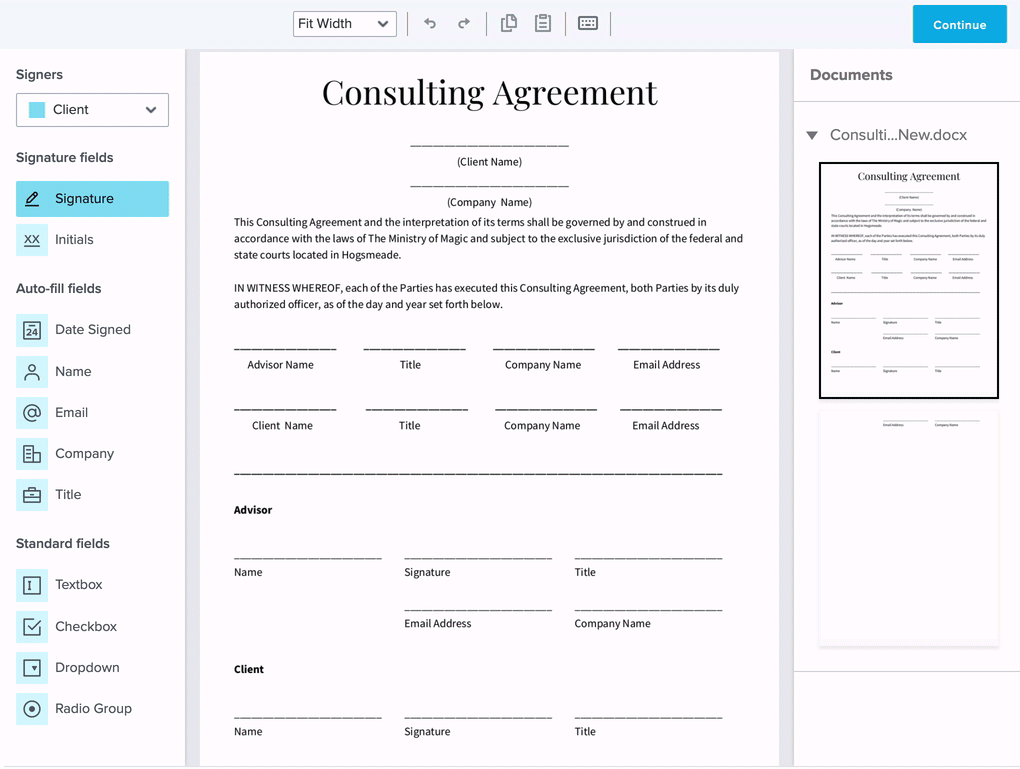
2. Create one flexible template for varying signers
When using our Dropbox Sign integration did you know that you can create just one template that works for both single and multiple signers? 😊
AdvicePay has an amazing feature that allows roles to be removed on a per-document basis when sending a template. This allows you to use one template for any signing scenario -- instead of having to manage different templates just to support differing numbers of signers.
To take advantage of this, you'll start by creating a template that includes all the possible roles that may be needed when a document is sent out for signature.
When sending, you will then see an X button next to the role(s). To remove an unnecessary role, simply click the X!
If you remove a signer by accident, that's no problem! 😊 Just look for the blue Undo button at the end of the signing order and click that button. They will be added right back to the list!
Learn more about this feature here.
3. Have AdvicePay automatically populate key information on a document
We want to make the document signing process as simple as possible to save you and your clients both time and stress. So, we don't want you to miss out on this fun Dropbox Sign feature: auto-filled fields!
When you set up fields in your template, you can have the below content auto-populate when a document is sent out:
- Client Name: The printed name of the signee for that role
- Advisor Name: The printed name of the advisor in AdvicePay
- Invoice Amount: The invoice amount (when the document is sent with a payment request)
- Invoice Frequency: The invoice frequency (when the document is sent with a payment request)
- Up-Front Invoice Amount: The upfront invoice amount for one-time invoices attached to subscriptions (when the document is sent with a payment request)
How do you make the magic happen and auto-populate your template?
- Select the Textbox field and drag it in place in your document template.
- In the menu under Assigned To, select Sender.
- In the menu under What text goes here?, select which content above you would like to auto-populate.
Once the template is used to send a document, the information will auto-populate -- it's that simple! 👊
Learn more about this feature here.
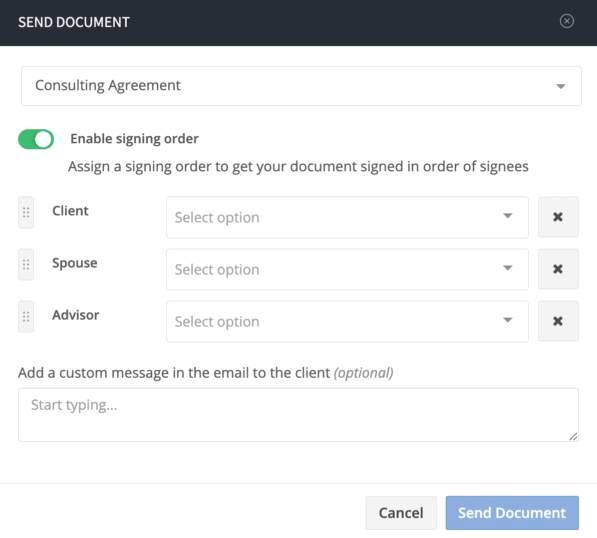
4. Signing order!
Wouldn't it be nice to assign an order to the signees so that the agreement will be signed in that specific order? We've got you covered!
When using Dropbox Sign and setting up a template, toggle on the Enable signing order button and then drag any roles created up or down to create the perfect signing order.
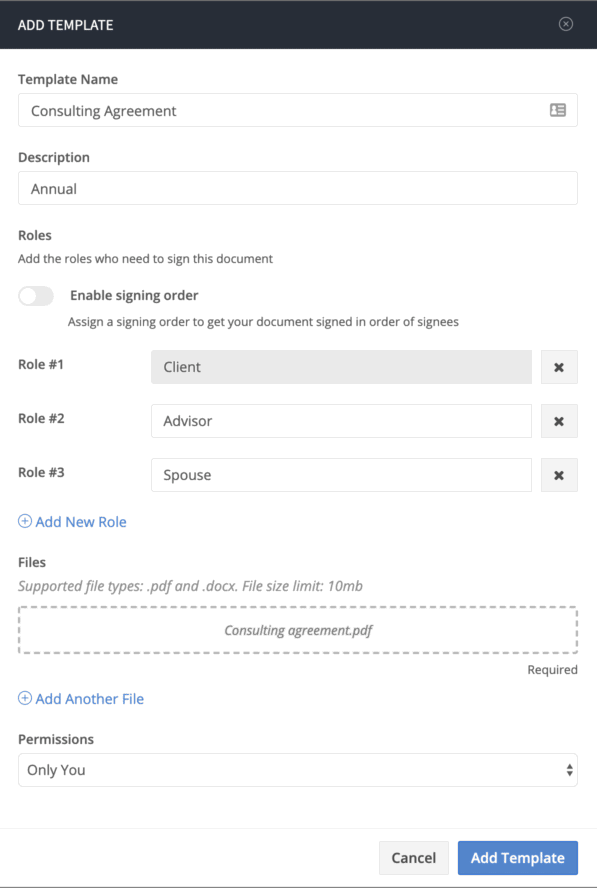
Not sure what signing order you would like for your template just yet? That's okay! Toggle on the Allow edits to signing order before sending document button and you will be given the opportunity to move any of the roles to a new order when the document is being sent.
If a signing order is enabled, email notifications to sign the template will be sent in order of the roles you have created.
Learn more about this feature here.
5. Download document PDFs
Whether a Dropbox Sign or DocuSign document is unopened, signed by some signees, or completed -- you have the option to download a copy!
To do this from your dashboard, click on the Document tab under Document Vault and locate the document you would like to download.
Next, click the arrow next to your client's document and choose Download. A PDF will appear at the bottom of your screen -- available for you to click, view, and save. 😊
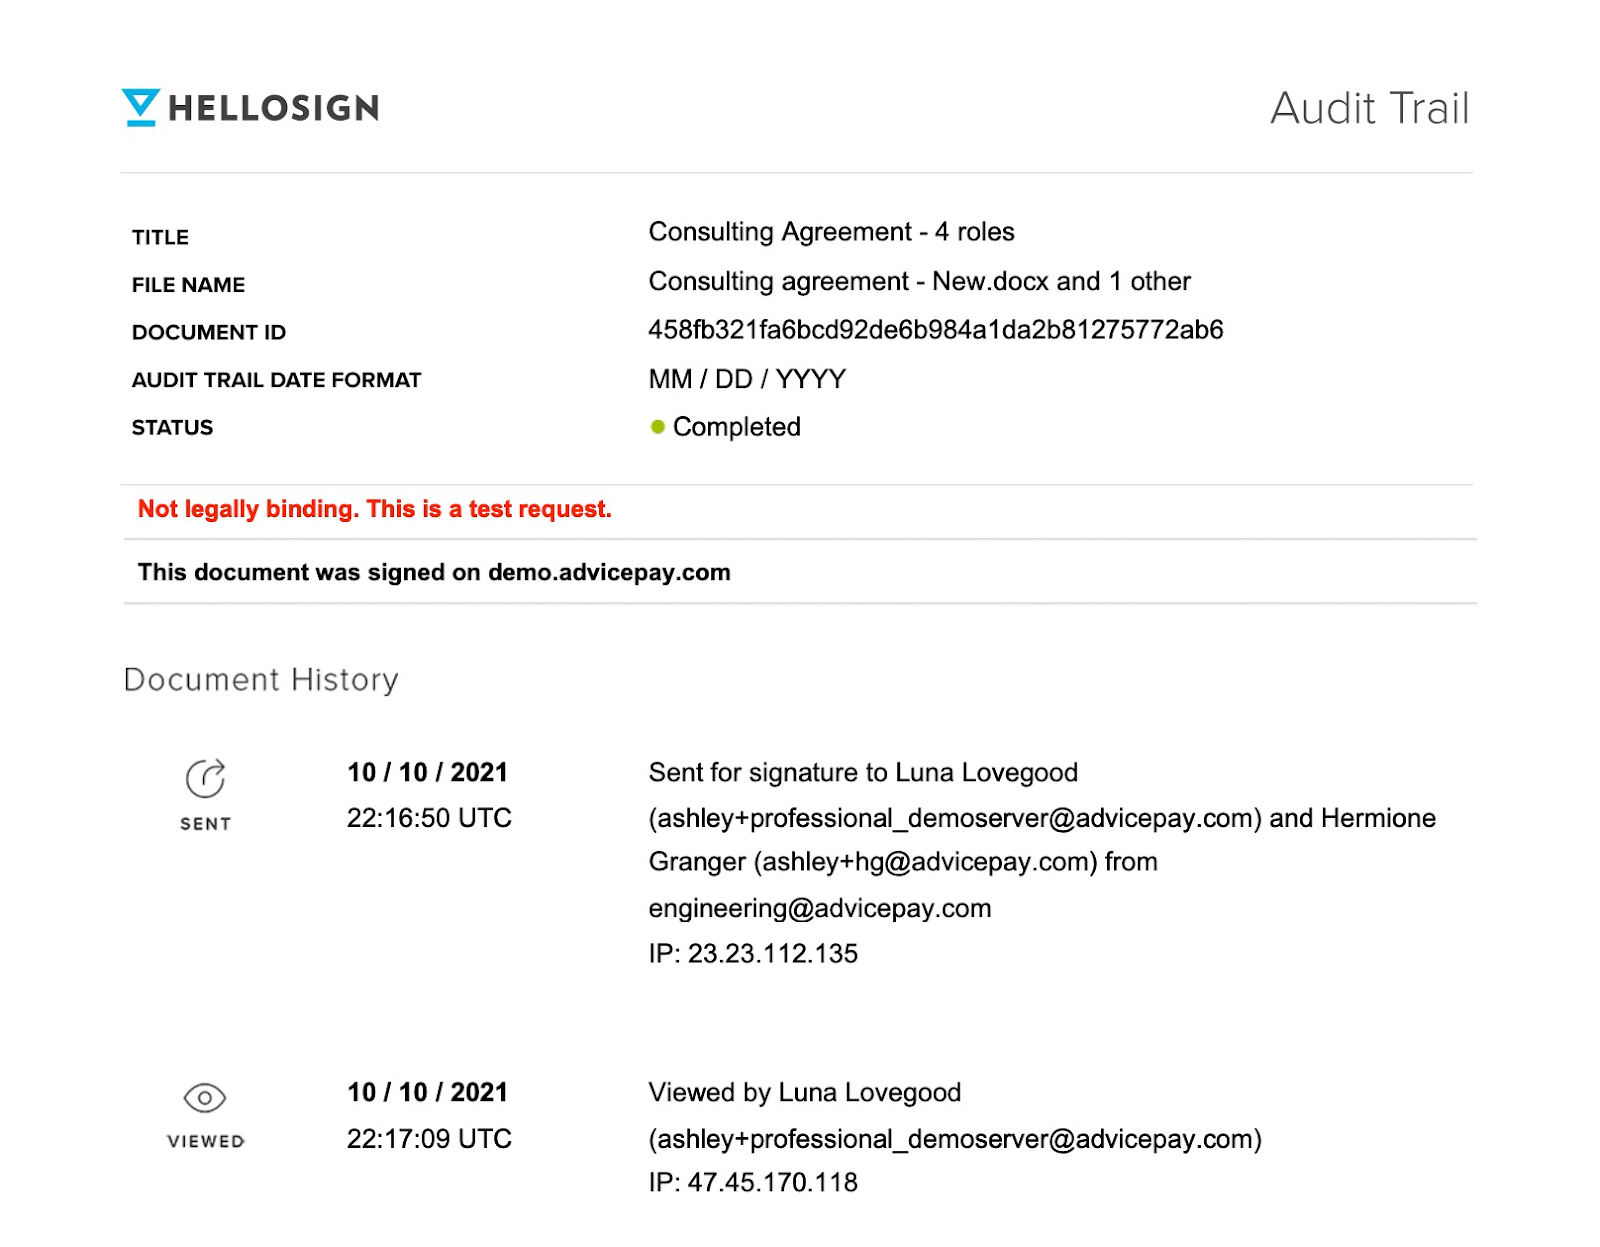
One informative compliance feature available when downloading your Dropbox Sign documents is the ability to view the Audit Trail.
This provides extra details on when the document was sent out for signature, who it was sent to, what their email address was, when the signer signed, their IP address and so much more.
Here's an example:
We know how important it is to make every minute count when running your business. I hope that these tips and tricks make managing and obtaining signatures from your clients even easier!
If you have an eSignature feature you're eager to see added to AdvicePay, please drop us a line at support@advicepay.com. We'd love to hear about it!
Share this

Announcing the AdvicePay and DocuSign Integration

How to be AdvicePay Happy: eSignature Tips

No Comments Yet
Let us know what you think